Hands on the Raspberry Pi 4 With Ubuntu
About the Raspberry Pi
The Raspberry Pi is a small, powerful, low-cost, single-board computer. It is available in different models and presentations; you can get the board only or buy a kit including case, keyboard, mouse, power supply, etc. It is also available as a computer built into a small keyboard. The Raspberry Pi 4 is available in three different versions: 2GB, 4GB, and 8GB.
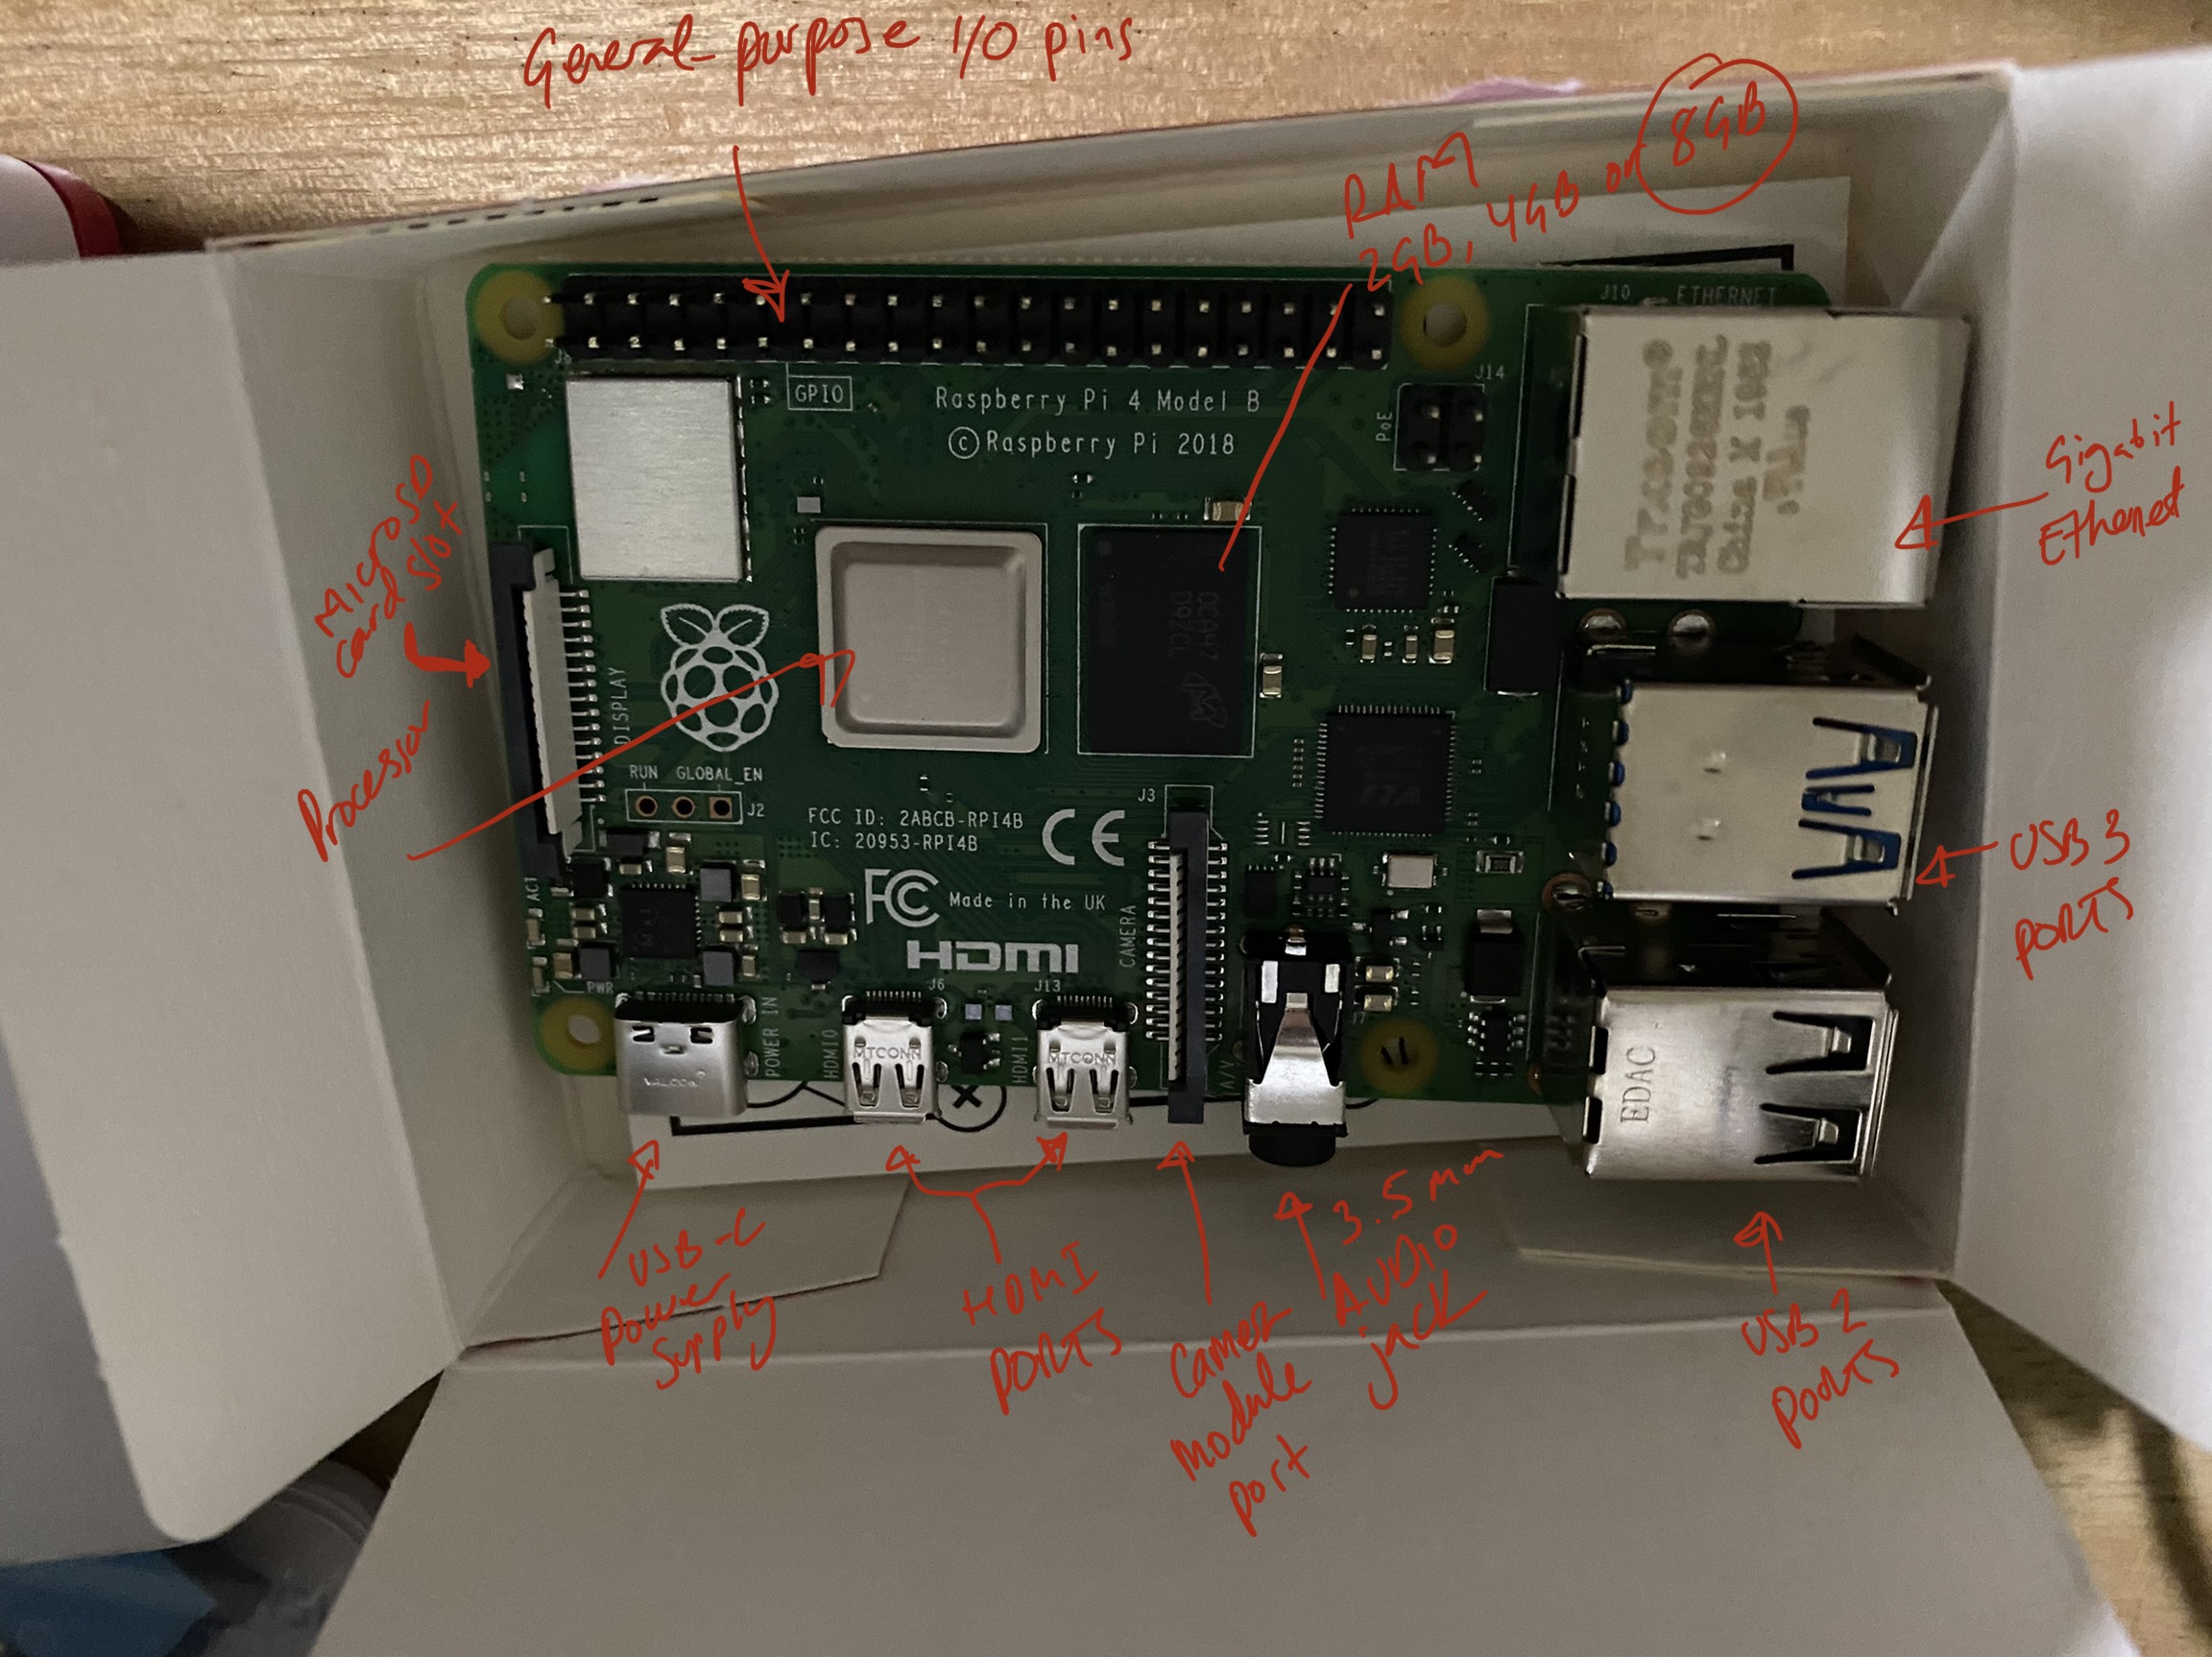
Raspberry Pi 4 components
As you can see, the Raspberry Pi comes with everything you need to set up a fully functional computer. All you need to do is plug in a keyboard, mouse, display, power, and that’s it, you’re ready to go.
Getting Started
In this case, I’m using the Raspberry Pi 4 Model B.
Prerequisites
To get started with Raspberry Pi 4 and Ubuntu you’ll need the following:
- A Raspberry Pi 4 board
- A micro SD card
- A USB mouse
- A USB keyboard
- A USB-C power adapter
- A monitor with an HDMI port, HDMI cable and a Mini-HDMI adapter
- Heatsinks or a fan (I do recommend getting a fan because the Raspberry Pi 4 can heat up really fast)
Setting Up the Raspberry Pi
The first thing I did was to install the heatsinks to help the board dissipate the heat.
NOTE: After testing the Raspberry Pi 4 I recommend getting a fan because the heatsinks are not enough to keep the board cool.
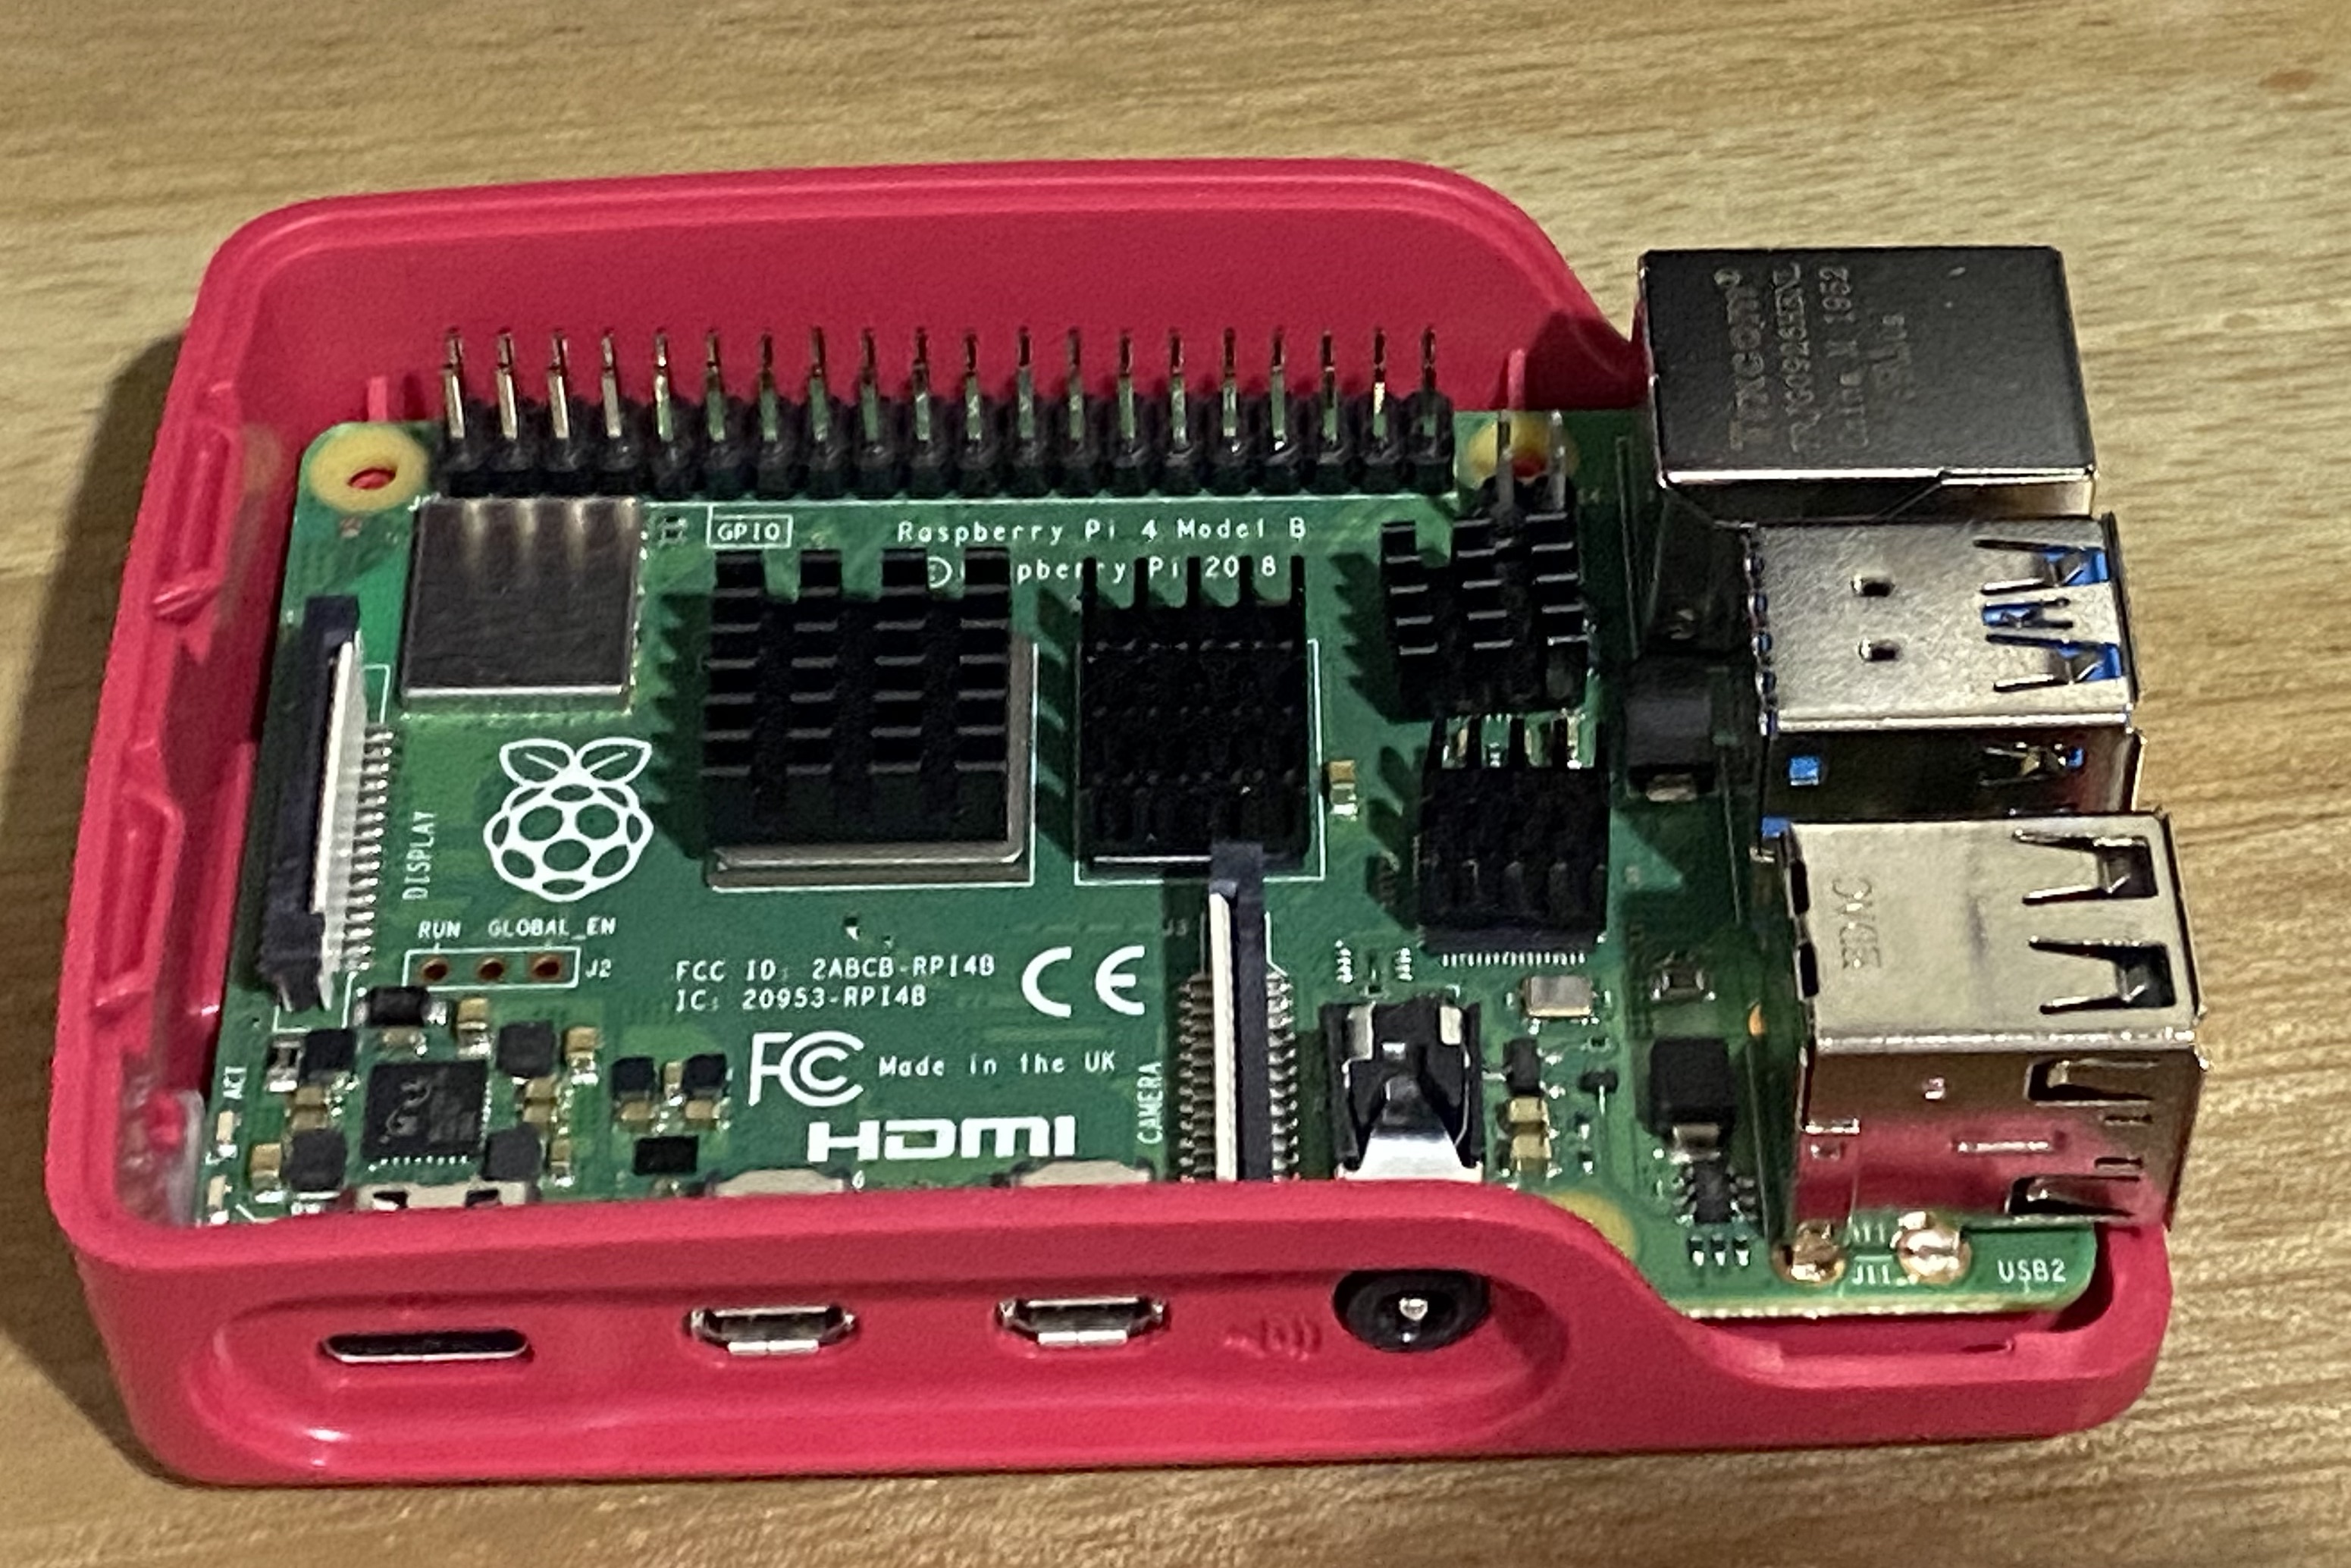
Heatsinks on the Raspberry Pi 4
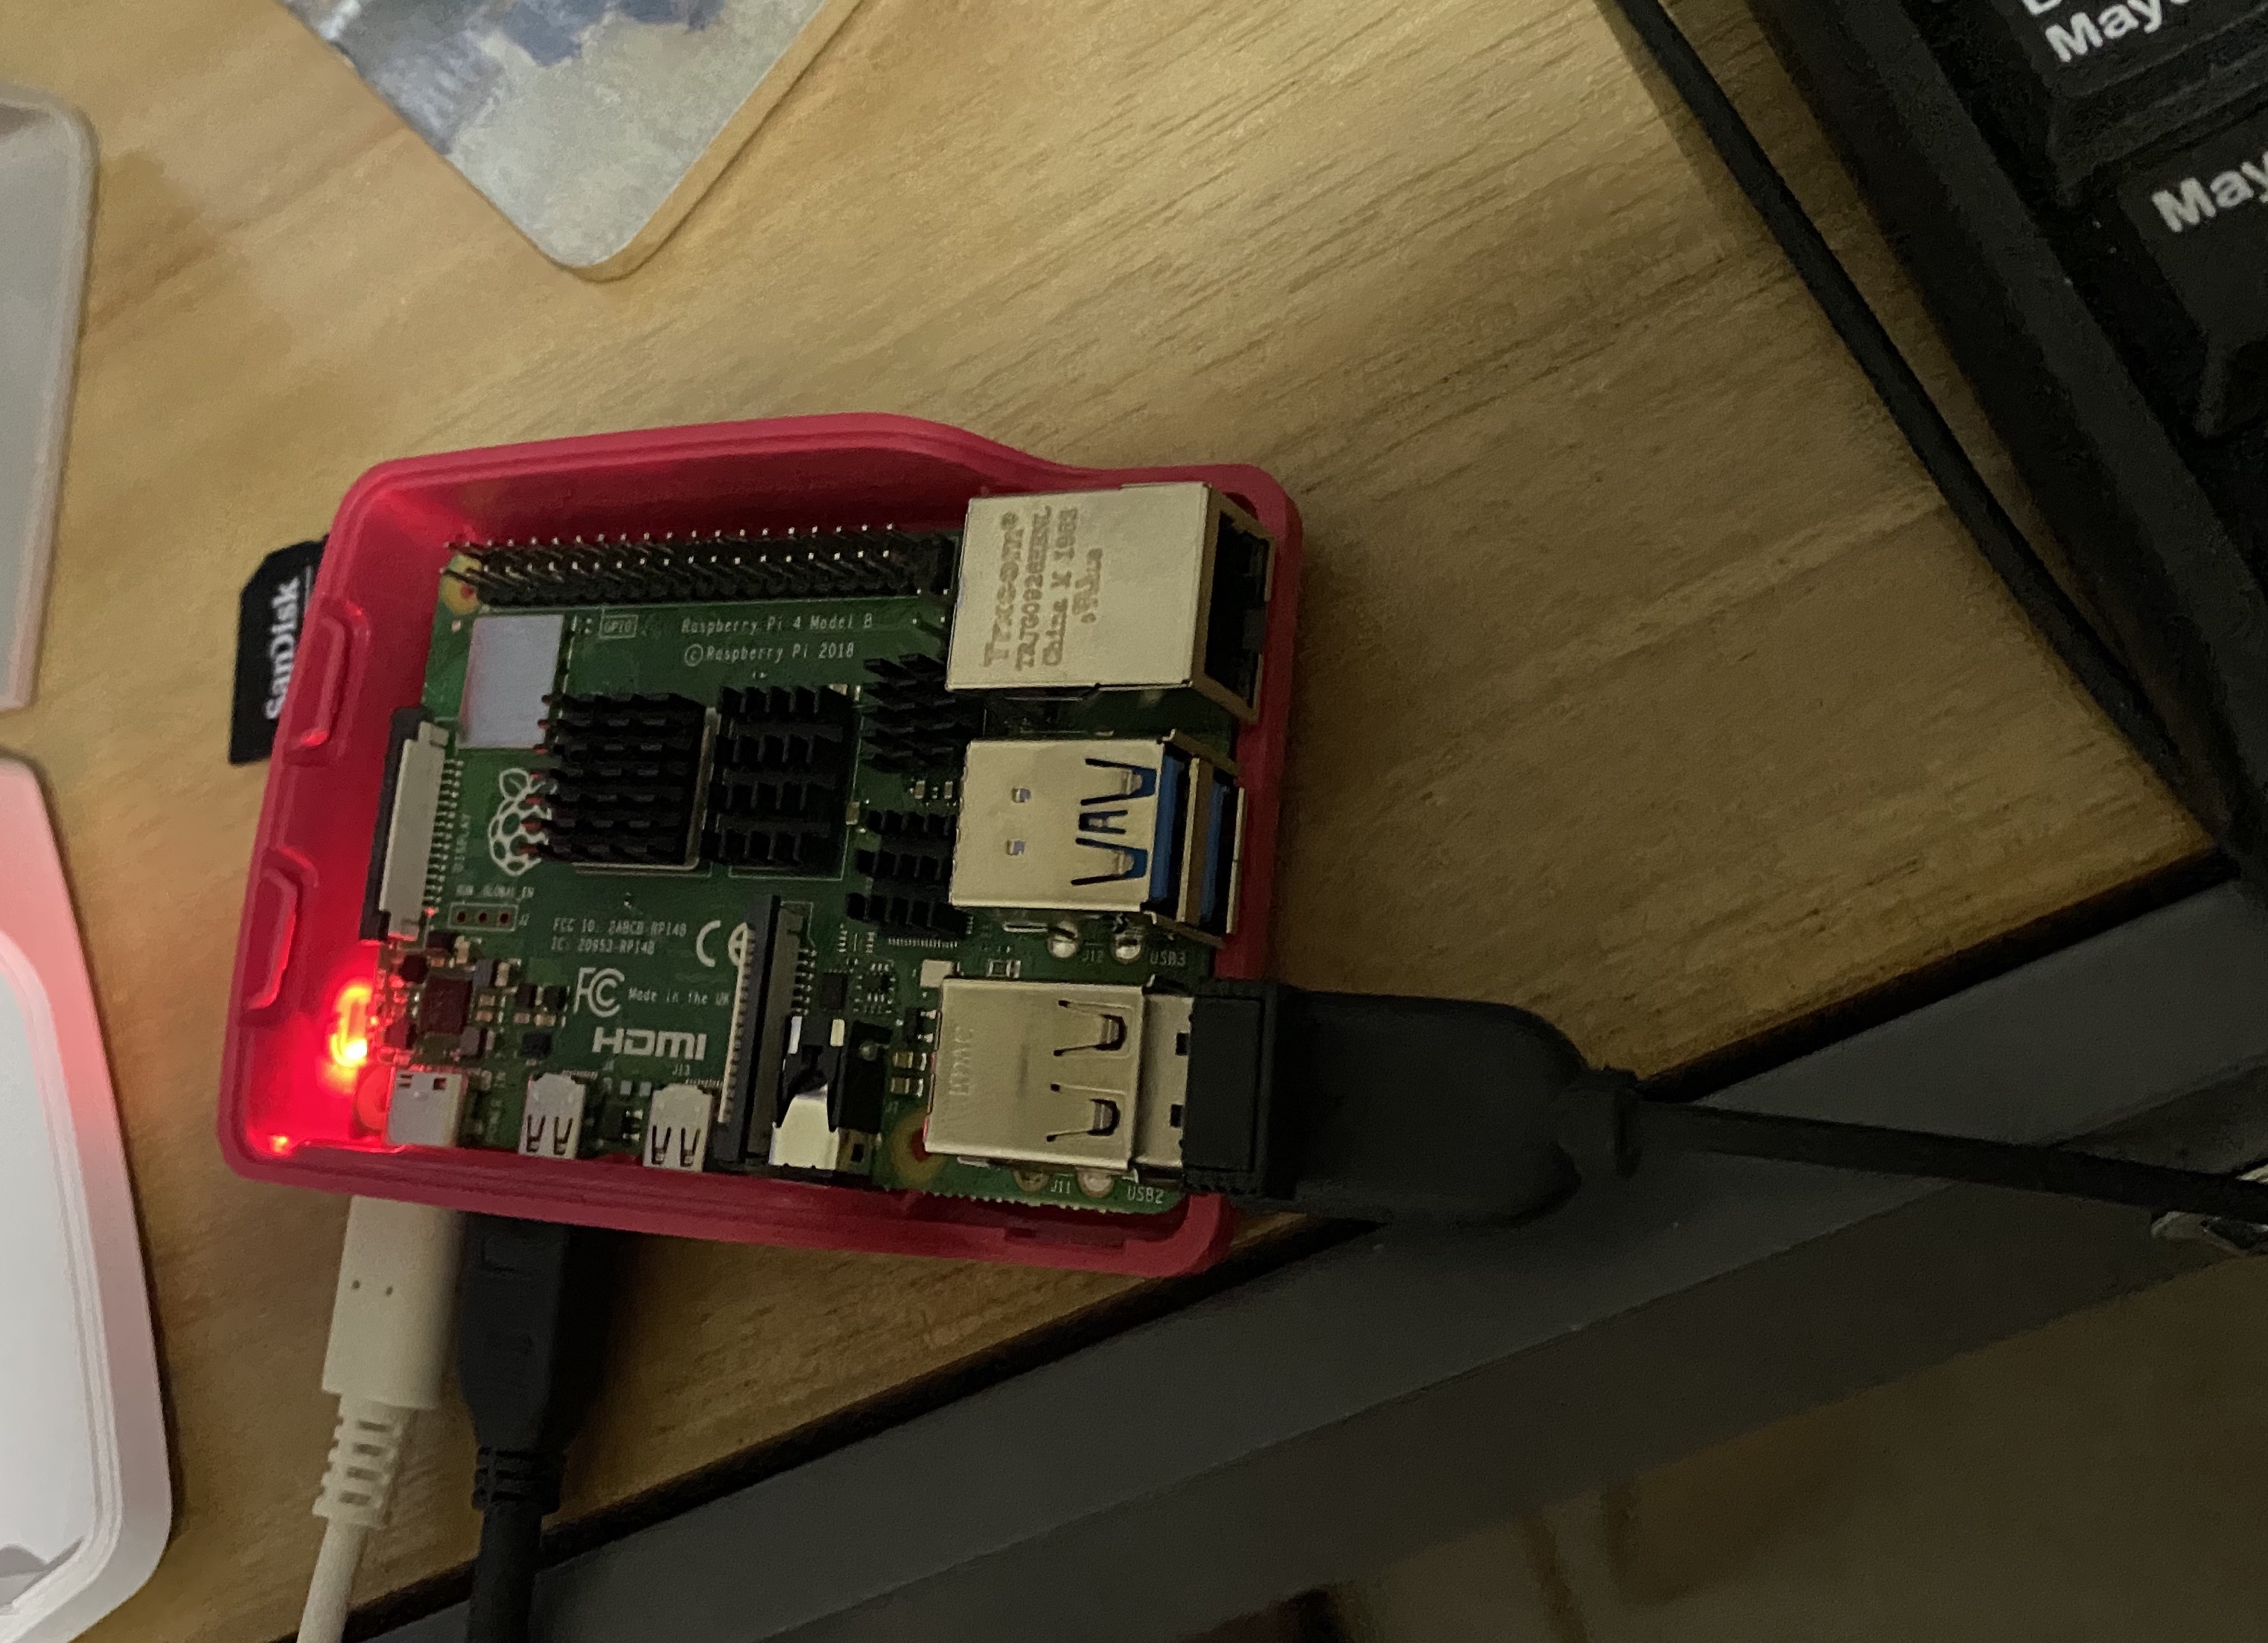
I also bought the Raspberry case, so after installing the heatsinks, I put the board in the case to keep it protected.
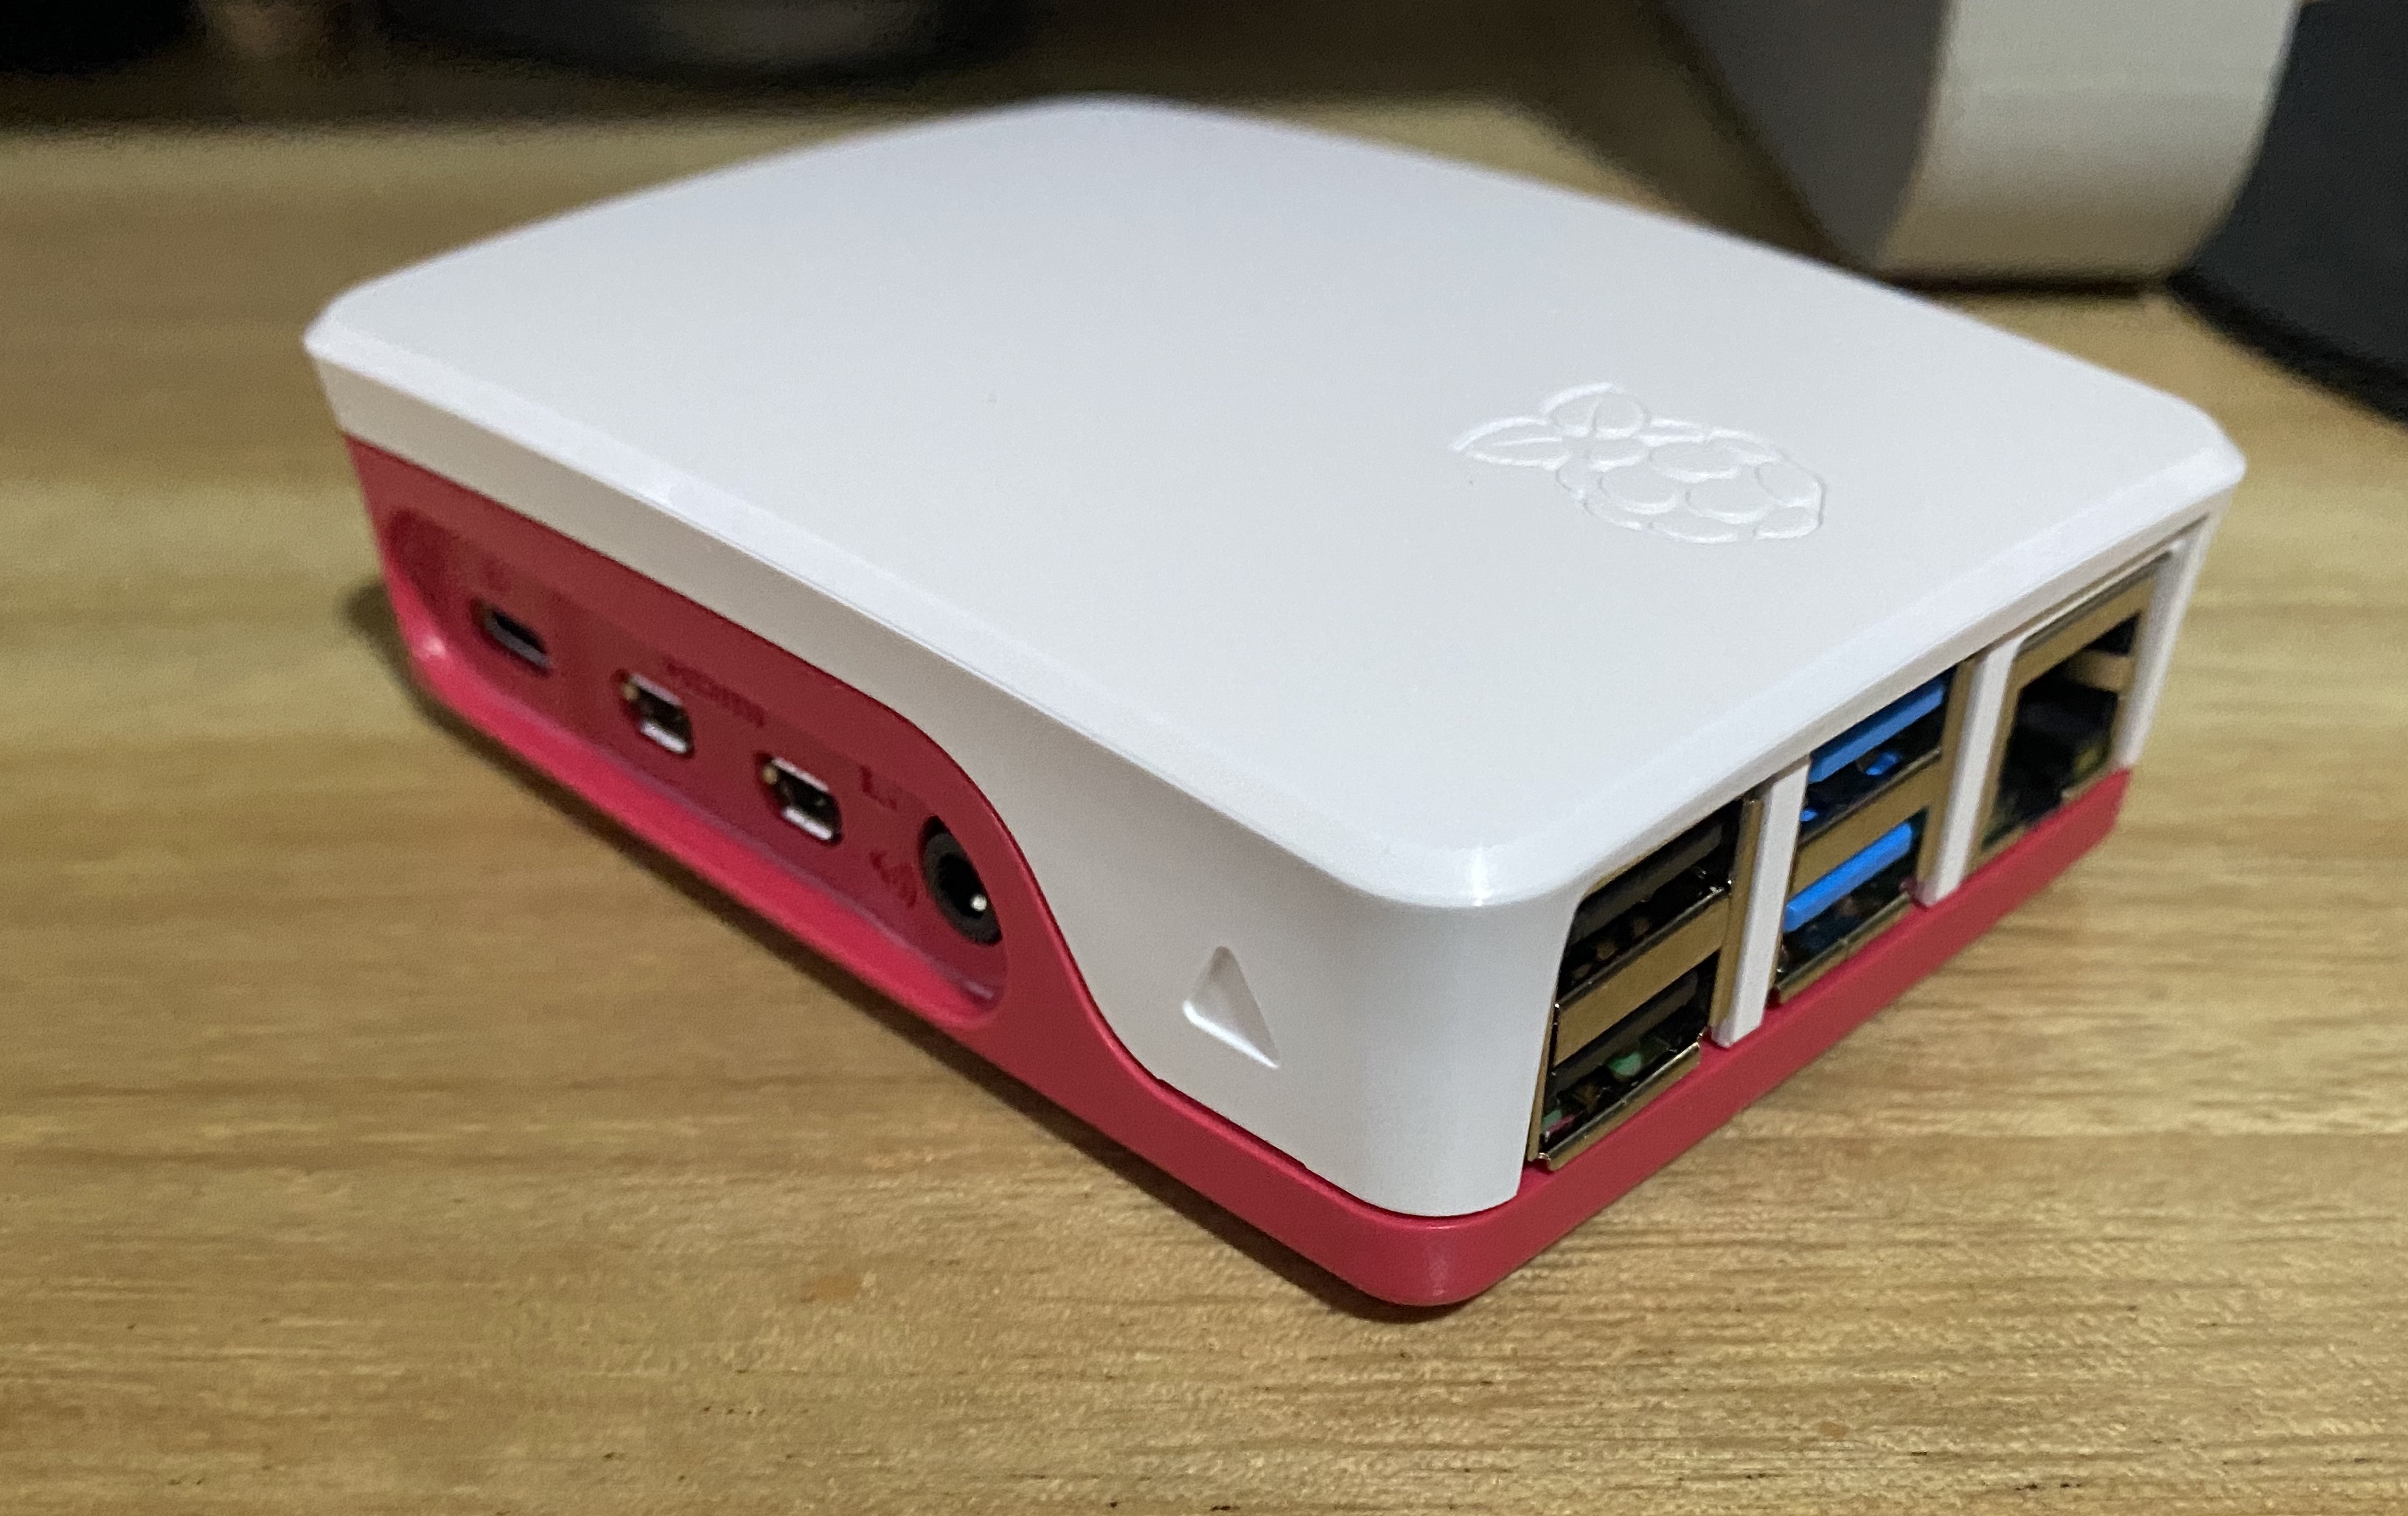
Raspberry Pi in its case (it fits perfectly)
Downloading and Installing the Operative System
The Raspberry Pi organization recommends to install their Linux distribution in the Raspberry Pi. It’s a Debian-based operative system called Raspbian or Raspberry Pi OS, and it’s freely available to download on their web page.
In this case, I wanted to try with Ubuntu to see how the Raspberry Pi works with it. Ubuntu 20 is also freely available for Raspberry Pi.
To install an OS for your Raspberry Pi:
- Download the Raspberry Pi imager.
- Insert the micro SD card into your computer
- Open the Raspberry Pi imager
- Click CHOOSE OS and select the OS you want to install on your Raspberry Pi (I selected the Ubuntu 20.10 Desktop (Raspberry Pi 4))
- Click SD Card and select the SD card you inserted. This is where your OS will be stored.
- Click WRITE. It takes a few minutes.
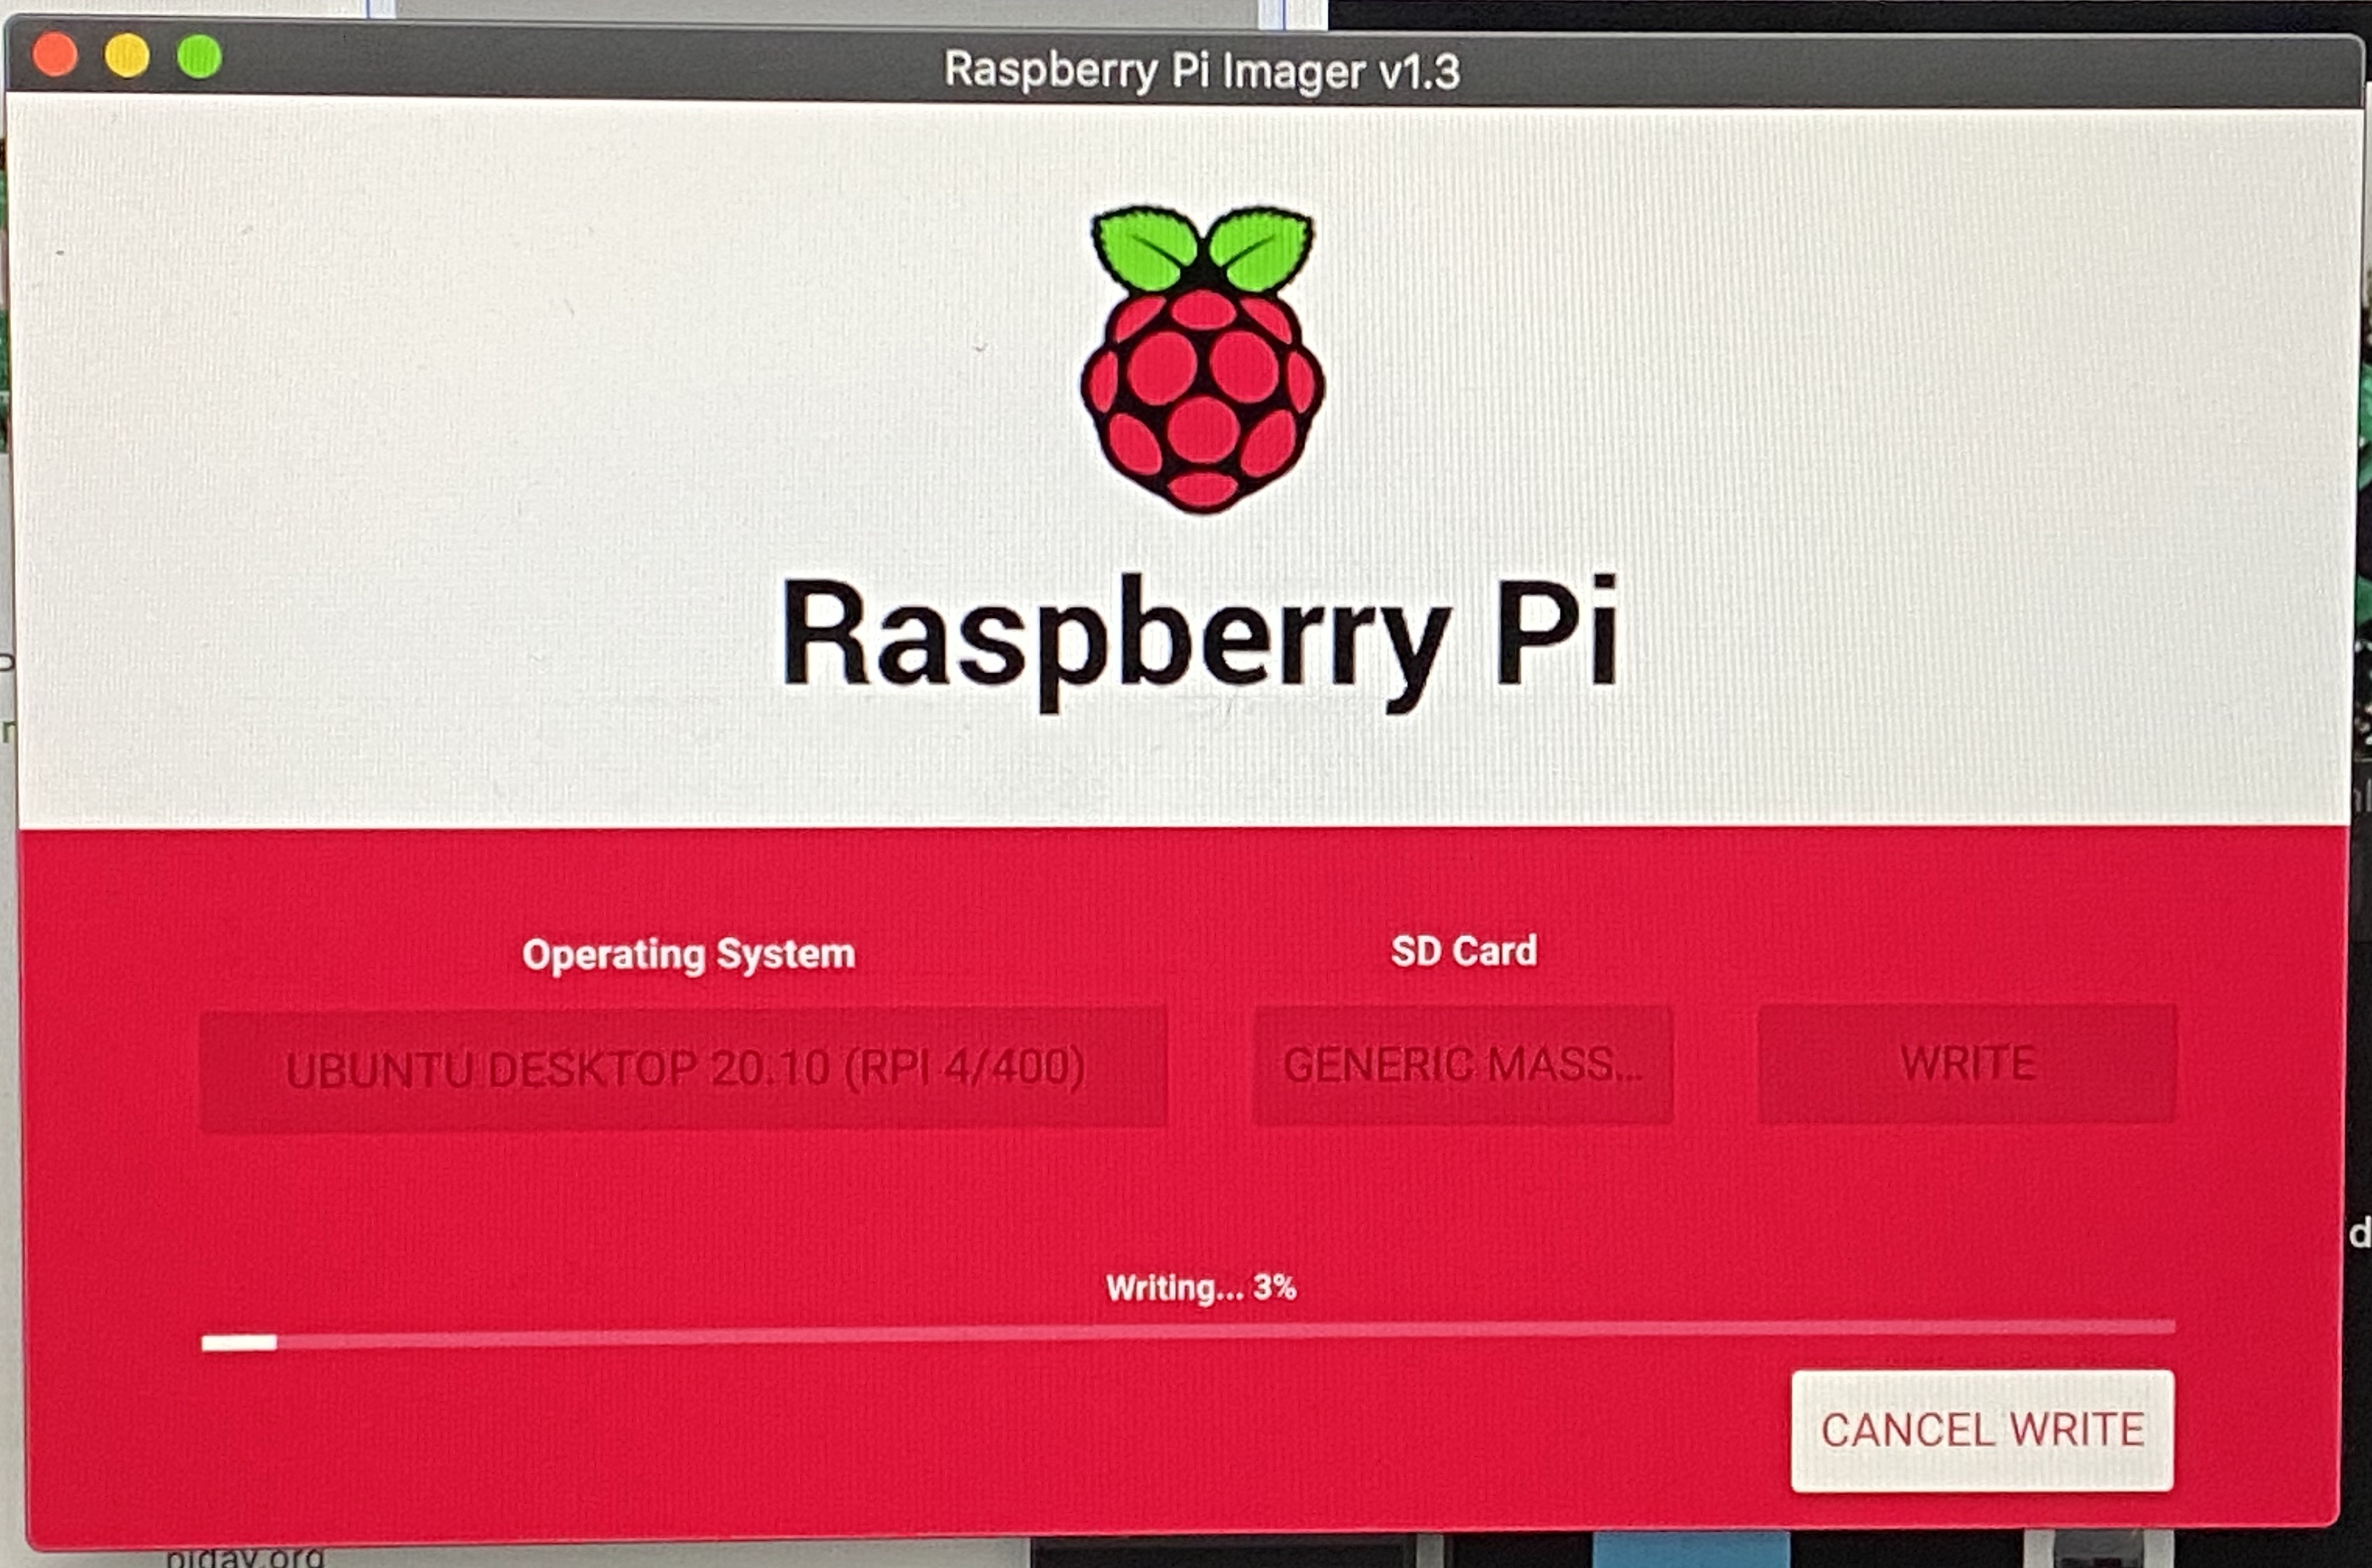
Raspberry Pi imager
- Once the imager finishes writing the OS into your SD card, remove it from your computer and insert it into the micro SD slot of your Raspberry Pi.
- Plug your mouse, keyboard, and monitor into your Raspberry Pi, and then plug in the power adapter.
 The boot process begins and the installation wizard appears.
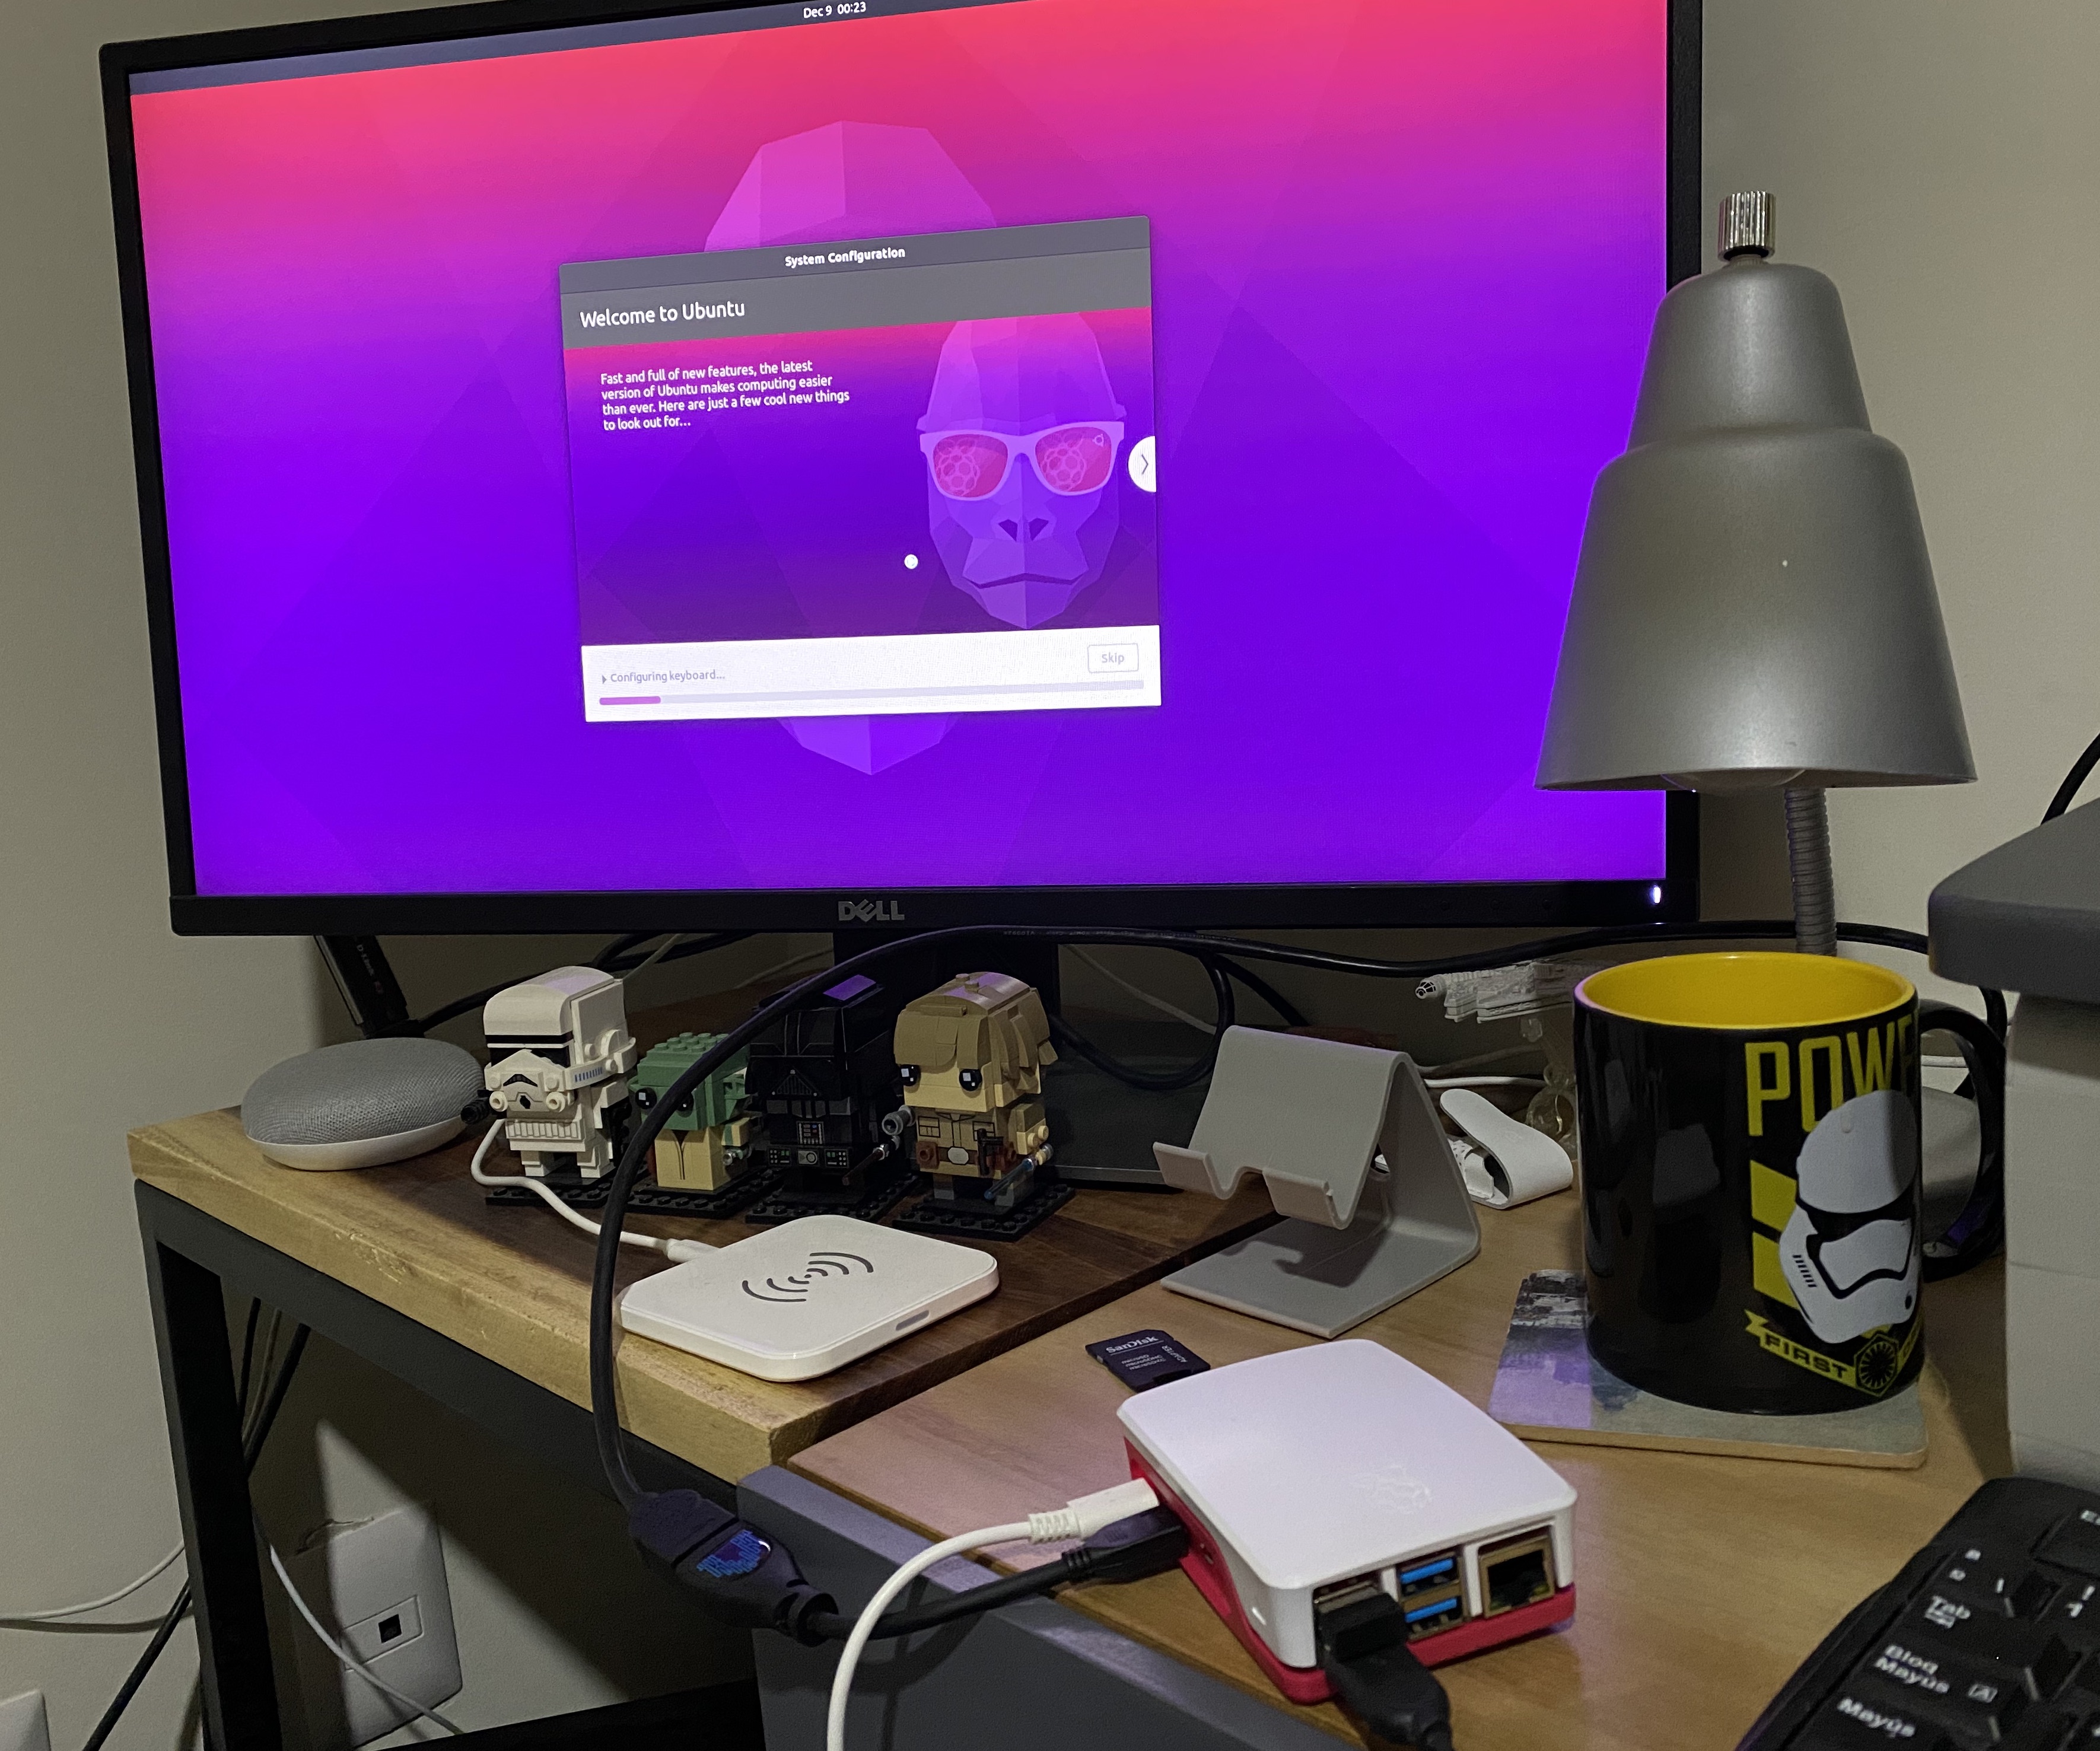
- Go through the installation wizard. Once you finish with the installation process you are taken to the Ubuntu Desktop and your OS is installed in the SD card.
Next time you start your Raspberry Pi it’ll take you directly to your Login screen.
You’re done! Now you have your OS running on your Raspberry Pi.
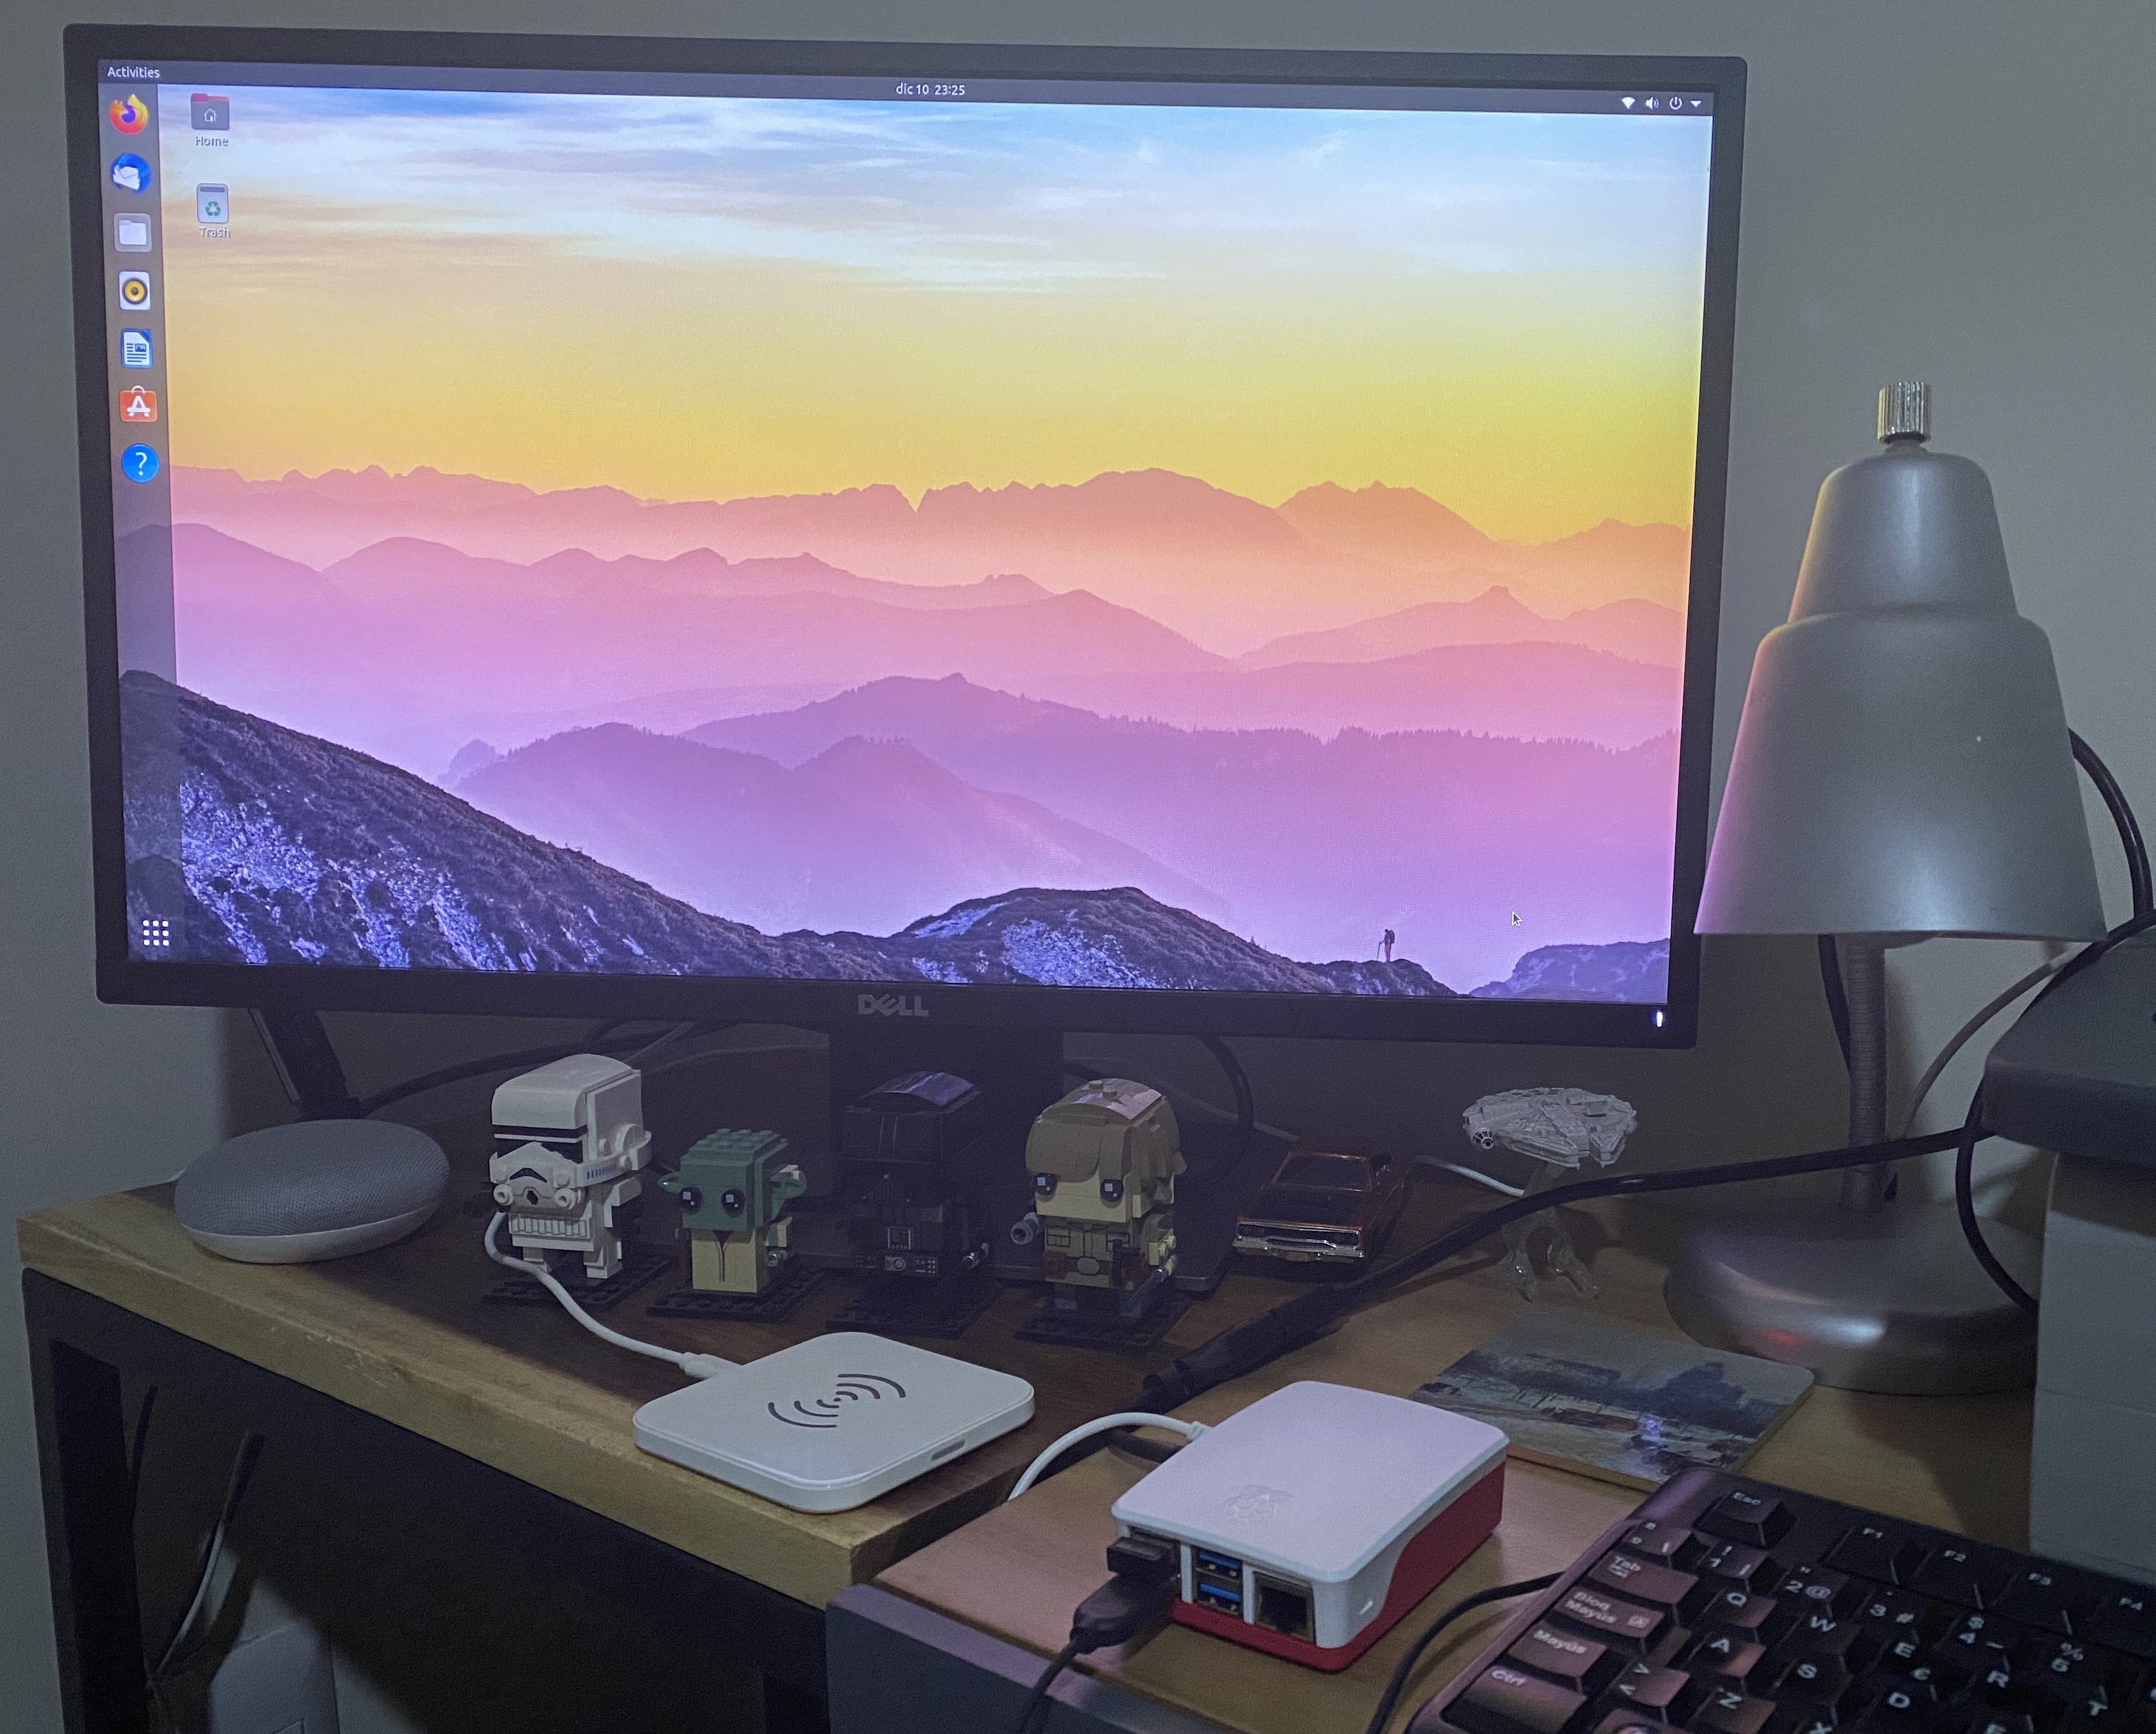
Ubuntu 20 running on Raspberry Pi 4